Canon T4i Review & Comparison – Astro Testing
I took a series of test images using a new Canon T4i (650D) for comparing to test images of other Canon DSLR models popular for astro imaging and DSLR astrophotography.
The test images include long exposure dark frames and also images in bulb mode to compare long exposures for sensitivity. Some info on the T4i along with tests and comparison results follow.
What camera features are new?
These are the main features Canon added to the T4i model that the T3i model does not have:
- Touchscreen Display
- Video Autofocus
- ISO 25,600
- In-camera HDR Processing
- All AF Sensors are “Cross-type”
What camera features are missing?
- Canon dropped the crop video features of the T2i and T3i models that were useful for planetary, lunar and solar imaging
This review is from an astro imaging perspective and focuses mainly on camera features that are most important for astro imaging. You may want to see other camera websites for normal daytime imaging reviews of the T4i model if you plan to do regular photography or infrared photography with a modified camera. The Canon models tested and compared here were all non-modified.
A Full Spectrum modified camera using the Astronomik MC Clear Glass, that replaces the anti-aliasing filter, would provide sharper images with increased detail.
Touch Screen Display: This is the first time Canon has added a touchscreen feature to a DSLR model. The articulating screen is similar to that used on the T3i and is the same size and resolution.
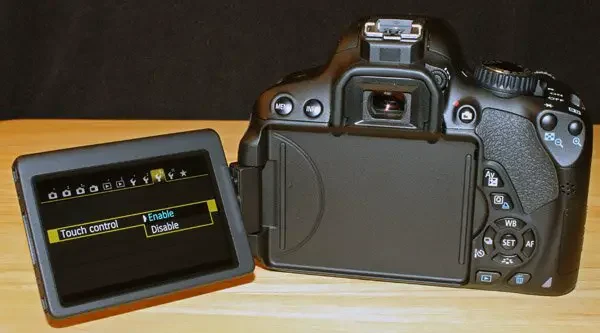
The touchscreen is contact sensitive as opposed to being pressure sensitive. I have been using Canon DSLRs for many years now on nearly a daily basis and prefer using the camera buttons over the touchscreen. I’m sure that is due in part to not having prior experience with using the touchscreen feature and that I also have large fingers.
For astro imaging one might think there is an advantage of using the camera buttons instead of having to look at the display, but even with the buttons you need to check the display for the feature you are changing. One button that was left off the T4i model is the Display (DISP) button and I use that button very often on the other models. For the T4i you can turn the display off by using the INFO button as a toggle switch. The touchscreen feature can be disabled using the camera menu.
As with the T3i model, the articulating screen feature can be a very useful one for those using the camera back display, as opposed to a computer screen for astro imaging. This avoids having to bend into awkward positions to see the camera back display or cricking your neck.
If the camera is mounted in a telescope focuser, piggybacked on a telescope, or tripod mounted; the display screen can be easily flipped out to the side and pivoted up or down 270 degrees. The display screen can be positioned outward in its normal position on the back of the camera as with non-articulating screen models or completely turned facing inward, so the LCD display is not seen.
This is a good feature to avoid errant light emitted from the display at dark sky sites and also to protect the LCD display glass from scratches.
Kit Lens: The T4i camera kit can be purchased with the EF-S 18-55mm f3.5-5.6 IS II zoom lens that Canon has been providing with the T3i model. Canon is also selling the T4i as a kit with a new EF-S 18-135mm f/3.5-5.6 IS STM zoom lens. The “STM” designation stands for stepper motors used in the lens for autofocusing, that is silent and faster than with non-STM lenses.
The STM feature has little use for astro imaging but is very useful for non-astro video because other non-STM lenses make a lot of focusing noise when capturing audio with video. I purchased an external mic for my T3i camera and still had a lot of focussing noise recorded when taking video using the 18-55mm kit lens.
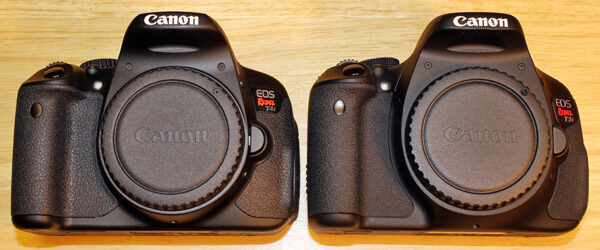
The T4i body is basically the same size and weight as the T3i. See the table below. The T4i and T3i, because of their larger size over previous models will not fit inside the Whole Camera Peltier Cooler if built to the dimensions on my web site.
| Model | Weight | Dimensions (mm) |
| T2i | 18.7 oz | 128.8 x 97.5 x 75.3 |
| T3i | 20.1 oz | 133 x 100 x 79 |
| T4i | 20.3 ox | 133 x 100 x 79 |
T4i and T3i compared side by side:
Front View:
Top/Side View:
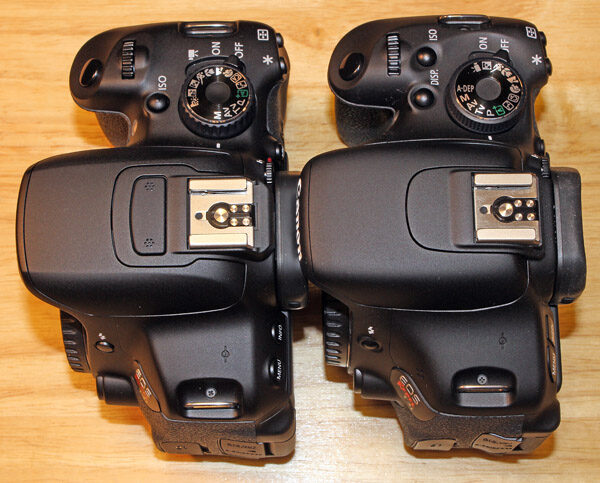
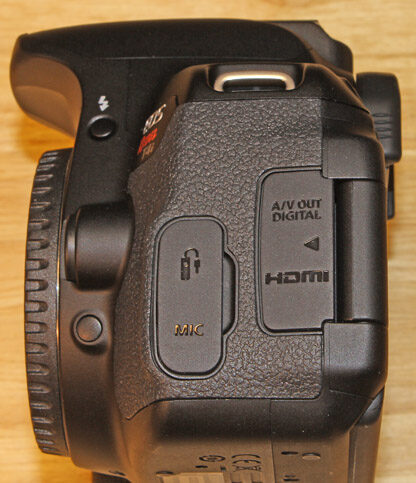
In the first photo above, notice that the T4i (on left) has two built-in microphones on the camera flash. That is for stereo audio recording. The T3i has only one built-in monaural microphone but the external jack can be used for stereo. Also notice in the T4i photo, the top selection dial now has three positions: Off, On and Movie. For previous Canon models this selection switch has two choices, Off and On, as can be seen in the photo of the T3i. When using the T4i camera for the first few times, when I used my thumb to turn the camera on, I was moving the selector past the “On” position and instead all the way to the Movie mode. I found that frustrating, but it was caused by force of habit. Also notice that the display (DISP) button is missing on the T4i as discussed earlier.Video Autofocus: This new feature is not useful in any way for astro imaging. For this new feature, Canon is using a “hybrid” CMOS imaging sensor. The hybrid sensor uses some pixels that are dedicated not for imaging, but instead for phase detection autofocus as detection sensors. Canon must be using adjacent sensor pixels in some manner to correct those pixels in the saved image. ISO 25,600: This higher ISO can be activated on the camera. It normally would not be used for capturing astro images but may be useful for liveview focusing and framing of astro images. In-camera HDR Processing: I can’t imagine how this would be useful for astro imaging but someone might find a use for it. Cross-type AF Sensors: This feature is not useful for astro imaging where almost all focusing is done in the liveview mode. The center AF point of the T3i model is a “Cross-type” with all other AF sensors being the non-cross-type. Canon made all of the AF sensor on the T4i “cross-type”.
The chart below has some key specifications for the T4i that can be compared to six other Canon models popular for astro imaging at this time. Notice that the T4i has the same number of effective pixels (18.7 million) and same pixel size (4.3µm) as the T3i. The T4i is now using a Digic 5 image processor as opposed to Digic 4 used in the T2i, T3 and T3i models. The T4i camera continues to use the same LP-E8 battery.

Movie Mode:
For planetary, lunar and solar imaging, the Canon camera model that has stood out because of its special “movie crop mode” is the T2i (550D). In movie crop mode, only the center 640 X 480 pixel area of the CMOS imaging sensor is captured at a speedy frame rate of 60 frames per second. The movie crop mode provides a 7X fixed zoom without video interpolation. This feature is not available on the T3i. Instead, a similar feature “Video Digital Zoom” is a function of the T3i that captures the center of the imaging chip, in a cropped zoom mode that is adjustable from 3X to 10X magnification. A drawback of the Video Digital Zoom feature for astro imaging is that the capture rate is limited to 30 frames per second, half the capture rate of the T2i. As an example, if imaging Jupiter with a 2 minute video, the T2i at 60 fps can capture 7200 frames from which to select the most detailed frames for stacking. Using a T3i at 30 fps would capture 3600 frames. I have an example of Jupiter taken with the T2i movie crop mode here. The T4i model has dropped both of these handy crop video modes so loses some functionality of the previous models especially for planetary, lunar and solar imaging.
Dark Frame Noise Testing:
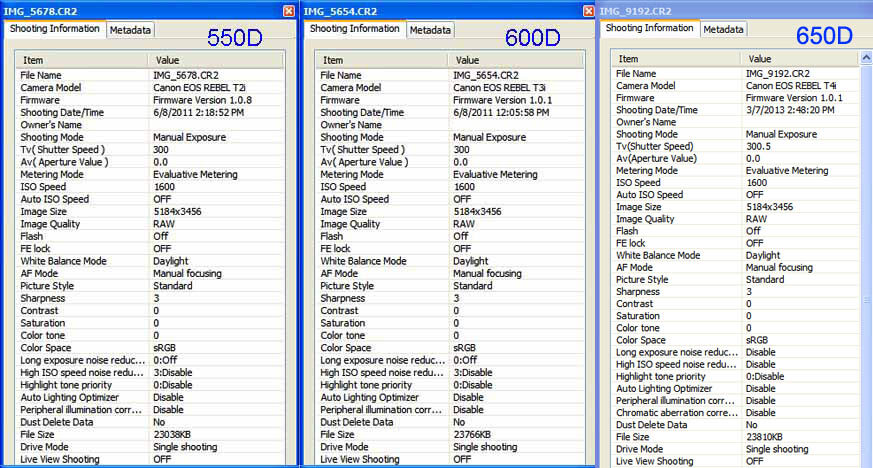
My first testing with this camera model was to take a series of 5-minute dark frame exposures at room temperature and ISO 1600 over a two hour period as was done in previous testing that I have done for the 450D, 500D, 550D, 600D, 1000D and 1100D. A 15-second delay was used between each exposure. Camera settings were adjusted to be similar to those used for other models and found to be most conducive for astro imaging. All testing was done at room temperature. The settings information from Canon’s DPP for the 550D, 600D and 650D camera dark frame test images is below:
Below are the histogram displays using Canon’s Digital Photo Professional software for the initial 5-minute ISO 1600 dark frame exposure of all seven Canon models for comparison.
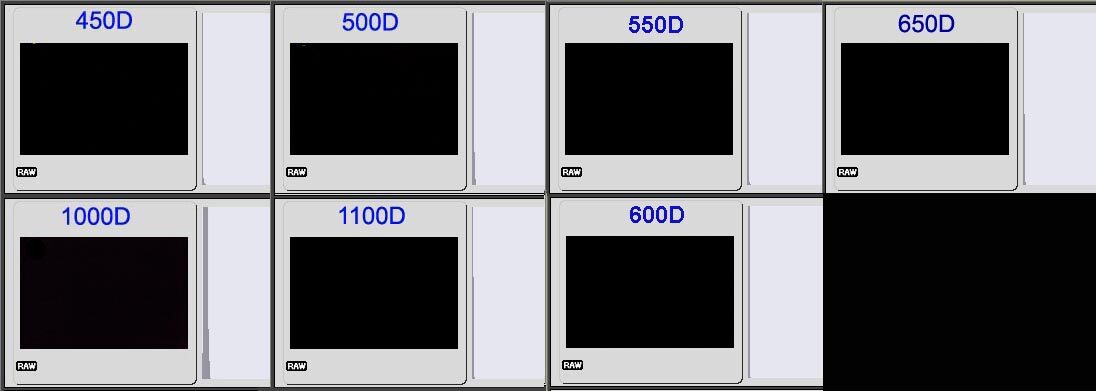
As seen in the above graphic, the 450D continues to have the lowest initial 5-minute dark frame noise with the 1000D having the highest level based on DPP histogram displays. The initial 5-minute dark frame noise of the 550D and 600D are similar with the 650D being slightly better. For the purpose of these tests, please be aware that the dark frame noise levels for cameras of the same model type that I have tested over time can vary from unit to unit as discussed HERE.
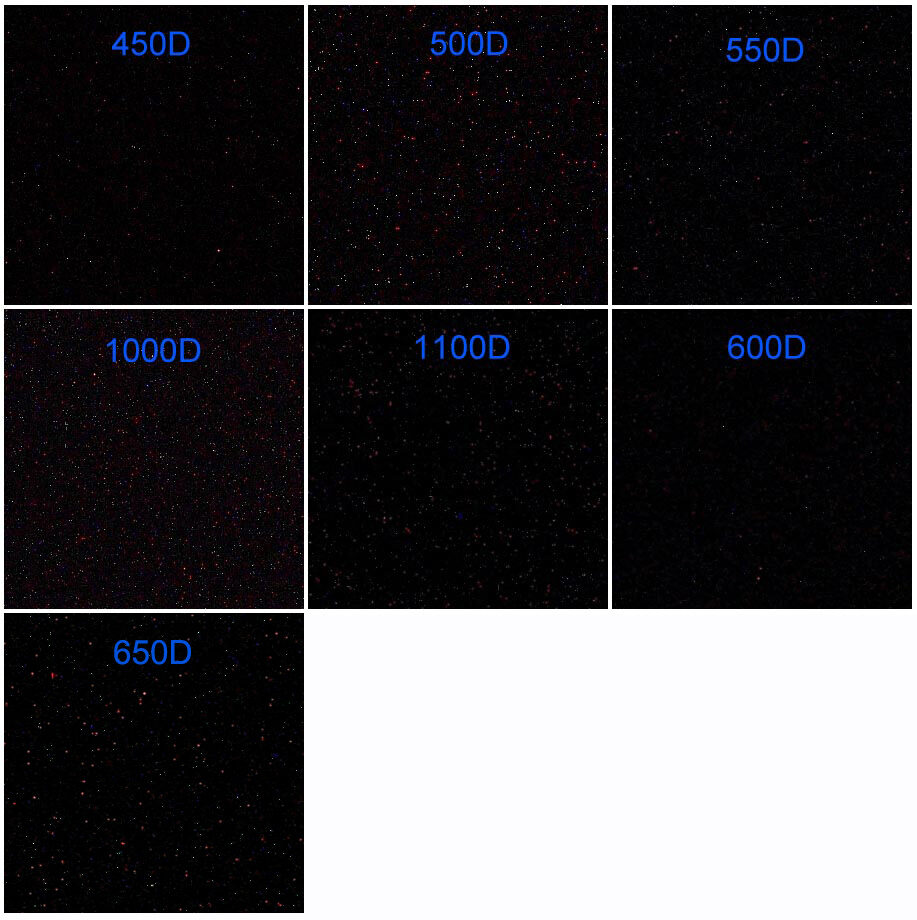
The image below compares the initial 5-minute ISO 1600 dark frames of all seven Canon models. RAW dark frame files were converted to 16-bit TIF files using Canon’s DPP software and the TIFs were then cropped at center to 300 X 300 pixels using Photoshop CS5. The 600D image appears to have the lowest noise.
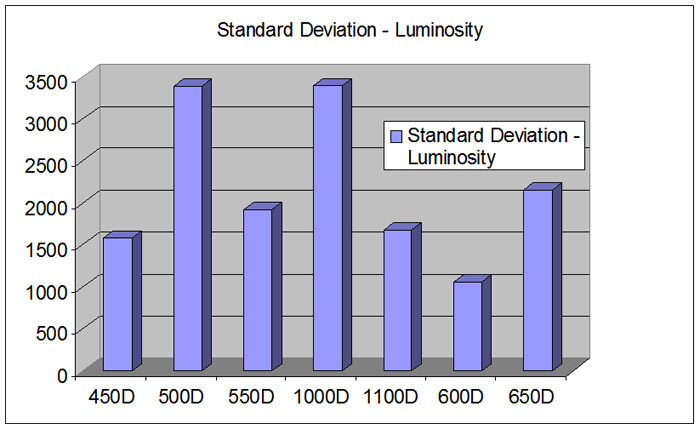
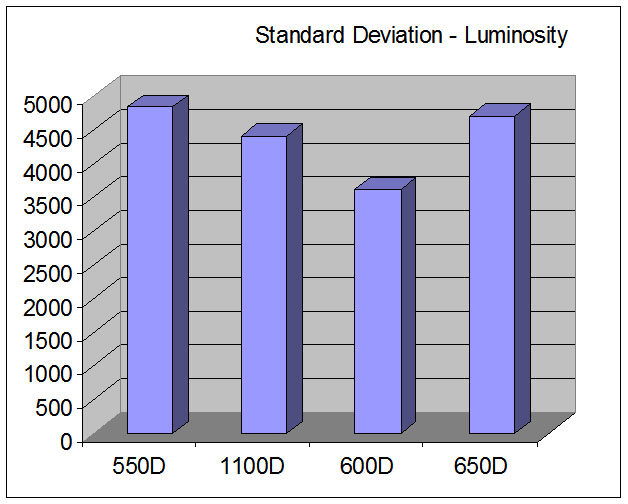
For the Full Frame TIF dark frame images, image pixel standard deviation values for luminosity of the initial dark frames were recorded using Images Plus for all seven Canon models and are displayed in the graph below:
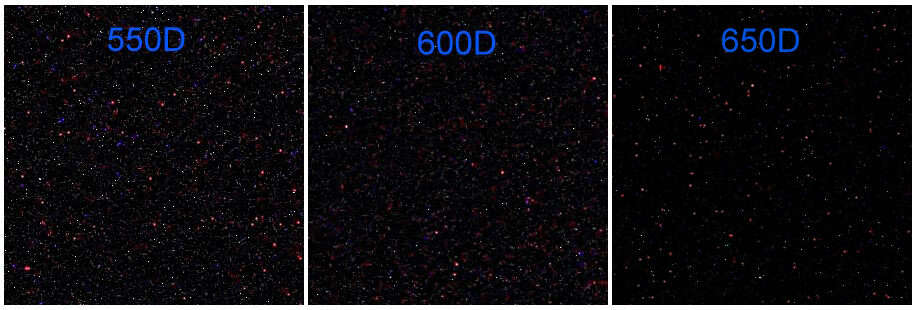
The histograms for three camera models are shown below, for both the initial 5-minute dark frame and the last 5-minute dark frame of the two-hour imaging sessions. Surprisingly, the 650D model maintains the lowest dark frame noise level at the end of the two-hour period based on the histogram display. Between the three cameras, the 600D has the highest noise level at the end of the imaging session based on the histogram display.
The image below compares the final 5-minute (after two hours) ISO 1600 dark frames of three Canon models. RAW dark frame files were converted to 16-bit TIF files using Canon’s DPP software and the TIFs were then cropped at center to 300 X 300 pixels using Photoshop CS5. There is less noise in the 650D image:
For the final Full Frame TIF 5-minute dark frame images (end of 2-hour period), image pixel standard deviation values for luminosity were recorded using Images Plus for all three Canon models and are displayed in the graph below:
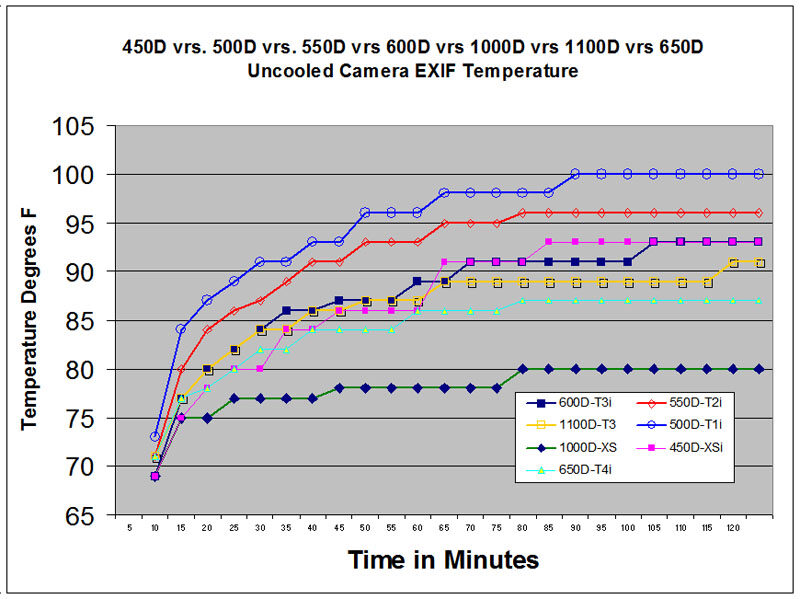
For the 5-minute dark frames taken continuously over a two hour period, I recorded the EXIF temperature readings from the RAW dark frame files over the two hour period for all seven camera models and plotted them below. With each new in-camera video capture model, Canon has been able to lower the internal temperature recorded in the EXIF data.
Sensitivity Tests:
For the sensitivity tests below, the cameras were powered with fully charged batteries and the same 16GB SD card was used to store the RAW images. 5-minute bulb exposures were taken using a digital timer remote for all three cameras. The viewfinders were covered to block any ambient light in a darkened room. A Canon Zoom EF 70-300mm 1:4-5.6 IS USN Lens was used at 300mm and F32 with the cameras set at ISO 1600. For all three cameras, in the Custom Functions menu item, long exposure noise reduction was turned off and high ISO speed noise reduction, highlight tone priority, auto lighting optimizer and peripheral illumination correction were all disabled. Liveview focusing was used at 10X zoom for all three cameras. Imaging was done in a dark room with a 5 watt incandescent lamp in one corner of the room. The lamp was covered to limit the amount of illumination for the testing using 5-minute bulb exposures. This was done to crudely simulate astro imaging of a faint deep sky object. Dark frames were not subtracted for the first test images.
Full Frame screen dumps from Canon’s Digital Photo Professional “thumbnail with information” view:
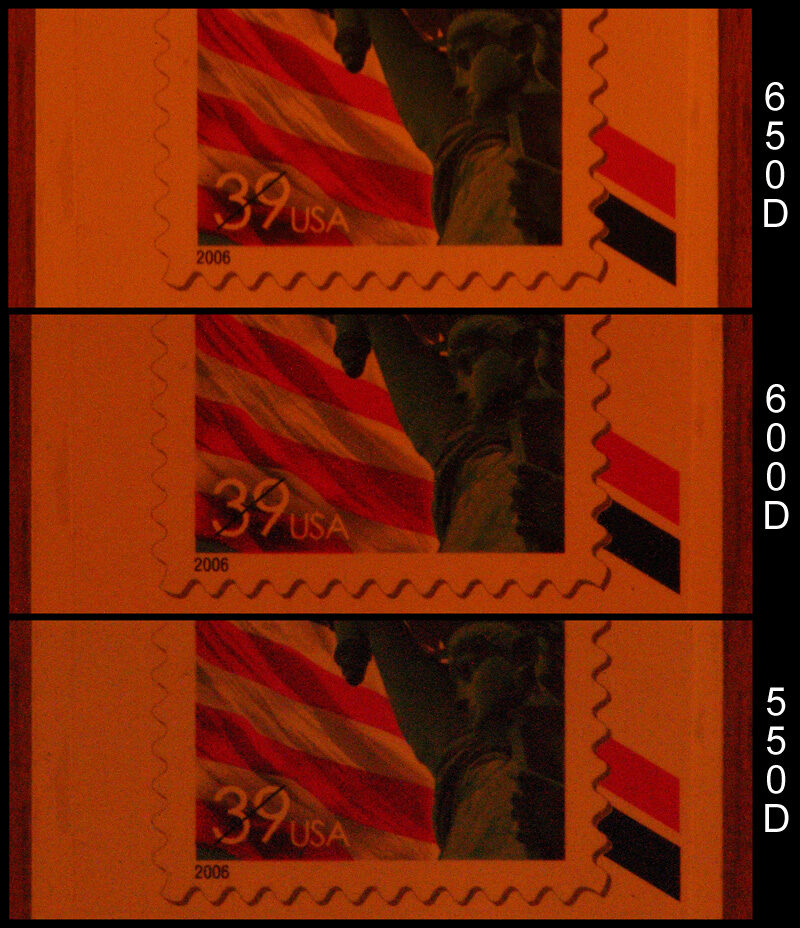
For this comparison, the RAW Full Frame of each camera was converted to a TIF file using Canon’s DPP, aligned, cropped and saved as a JPG file:
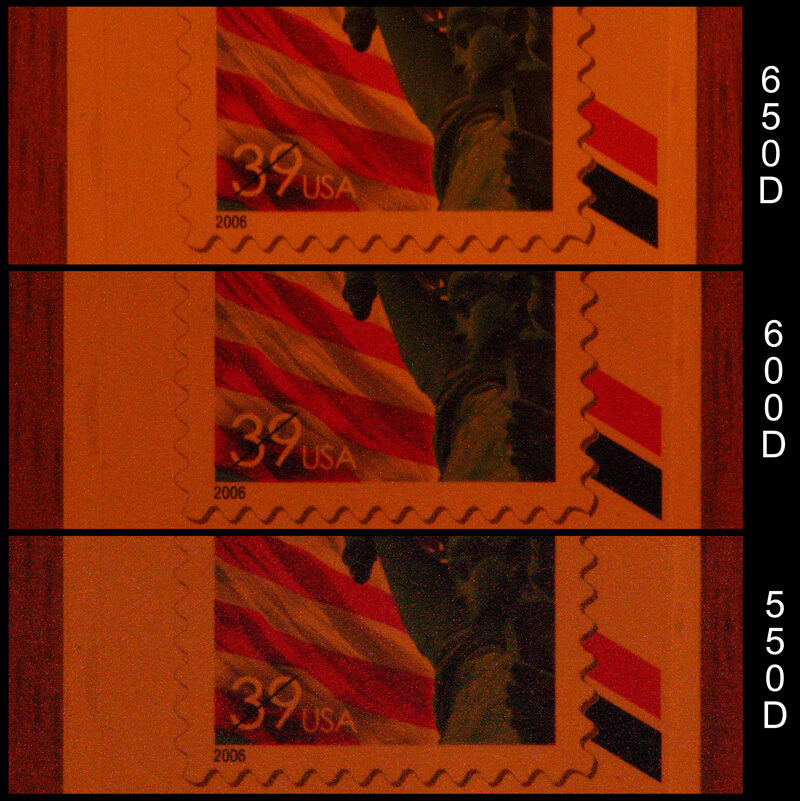
Based on the stamp images above, the 650D image is slightly brighter than the other two and has a less noisy appearance. If you look closely at the date “2006” on the stamp, it appears to be a little smoother than in the other two images. Keep in mind that no dark frames were used for the above 5 minute exposures.
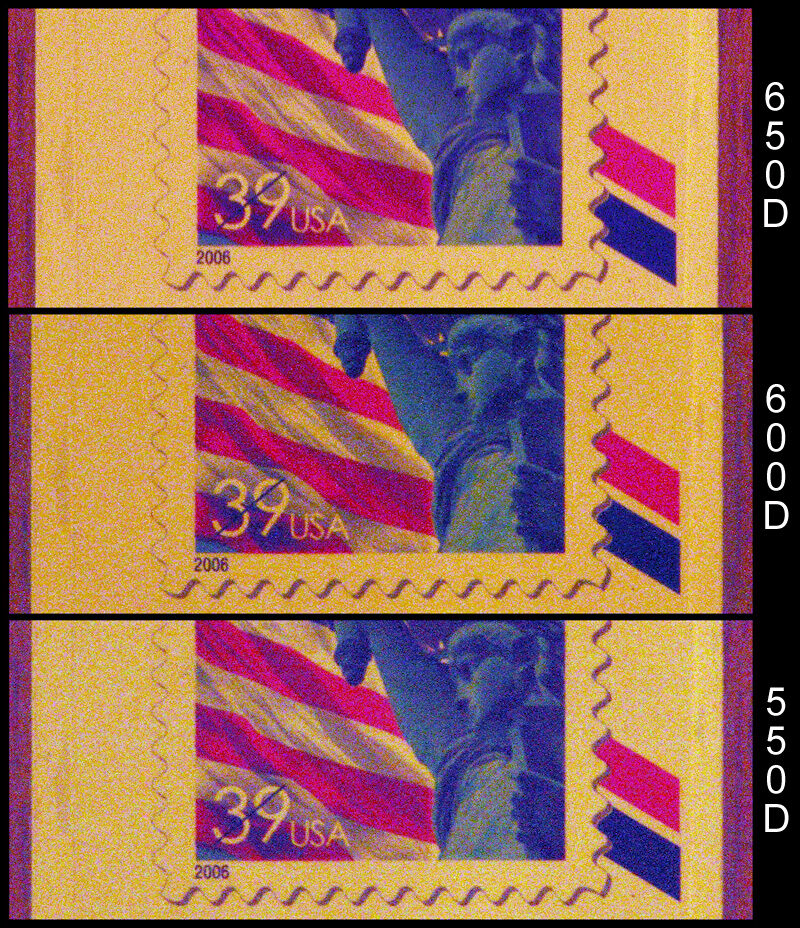
For the comparison below, a similar procedure as above was done, but this time each TIF image was calibrated with one dark frame using Images Plus software:
For the above dark calibrated comparison images, again the 650D appears to have the less noise.
As would be done for astro images, for the above dark calibrated images I adjusted the color balance using levels in Photoshop and attempted to get each image brightness level nearly the same. There is a lot of yellow in the processed image because of the weak incandescent light that was used to illuminate the room and the room wall colors that were reflecting light.
Summary:
Based on my review and testing of the T4i (650D) and earlier Canon camera models, these are the key T4i features I found most applicable for astro imaging:
- Low dark frame noise level similar to that of the 450D, 1100D, 550D and 600D even after two hours of continuous exposures
- High resolution 18.7 Megapixel size sensor with 4.3µm size pixels
- 14-bit ADC and newest DIGIC 5 image processor
- 3.0″ LCD articulating (swivel) display screen that can be easily flipped out to the side and pivoted up or down 270 degrees for ease of viewing
- Feel of the textured grip on both sides of the camera
What I didn’t like:
- Lack of any type of movie crop mode feature, as were features of the previous T2i and T3i models. The crop video mode is very useful for planetary, lunar and solar imaging.
- For camera modifications, the top and front of the camera body housing needs to be removed in order to access one sensor adjustment screw.
Check back for test results of the T4i (650D) compared to other camera models with peltier cooling.