How to Make Japanese Adorable Ohagi
Embarking on a journey to master the art of crafting Japanese Adorable Ohagi is akin to opening a door to a world where culinary finesse meets creativity. From the delicate balance of sweet and savory flavors to the meticulous process of shaping these delectable treats, there is a certain charm in how each step unfolds.
As the secrets behind these miniature delights are unveiled, one can’t help but wonder about the transformative power of adding a personal touch to these traditional delicacies. Stay tuned to discover how a sprinkle of imagination can elevate the humble ohagi into a work of edible art, ready to captivate both hearts and taste buds alike.
- Key Points
- Ingredients for Adorable Ohagi
- Step-by-Step Ohagi Making Process
- Tips for Shaping Ohagi Cutely
- Creative Ohagi Decoration Ideas
- Serving and Presentation Suggestions
- Storage and Enjoying Ohagi Later
- Common questions
- Can I Bring My Own Ingredients to the Ohagi Making Class?
- Are Children Allowed to Participate in the Ohagi Making Class?
- Is There a Dress Code for the Ohagi Making Class?
- Can I Take Home Any Leftover Ingredients or Ohagi After the Class?
- Are There Restrooms Available at the Meeting Point for the Ohagi Making Class?
- Last Words
Key Points
- Ohagi features sweet sticky rice with various coatings like red bean paste or black sesame seeds.
- Ohagi holds cultural significance in Japan and is enjoyed during seasonal festivals.
- Shape and decorate Ohagi with precision, experimenting with different flavor variations.
- Store Ohagi with care, consume within 2-3 days, and gently warm before serving for optimal taste.
Ingredients for Adorable Ohagi
To create the delectable and charming Ohagi, a traditional Japanese treat, one must gather a few key ingredients that are essential for crafting these adorable rice balls. Ohagi typically consists of sweet sticky rice coated with either red bean paste, soybean flour, or black sesame seeds. These flavor combinations offer a delightful contrast of textures and tastes, making Ohagi a popular choice for those with a sweet tooth.
Beyond its culinary appeal, Ohagi holds cultural significance in Japan, often associated with seasonal festivals like Higan, where it’s offered to honor ancestors and bring good fortune. The process of making Ohagi isn’t just about food preparation but also about connecting with traditions and customs that have been passed down through generations.
Step-by-Step Ohagi Making Process
As you embark on the journey of crafting your own delightful Ohagi, learn about the cultural tradition and culinary artistry of this beloved Japanese treat.
Here’s a step-by-step guide to help you create these adorable treats:
-
Prepare the Sweet Rice: Wash and cook the sweet rice until it’s soft and sticky.
-
Shape the Rice Balls: Take a portion of the rice and mold it into a ball.
-
Coat with Toppings: Roll the rice ball in various coatings like red bean paste, sesame seeds, or soybean flour for flavor variations.
-
Enjoy the Ohagi: Delight in the cultural significance of Ohagi by savoring these delectable treats with a cup of green tea.
Tips for Shaping Ohagi Cutely
For crafting irresistibly cute Ohagi, gently mold each rice ball with precision and care to create endearing shapes that reflect the essence of Japanese artistry and tradition.
When shaping Ohagi, consider using traditional techniques such as forming them into perfect spheres or flattening them slightly for a more rustic appearance.
Experiment with different Ohagi flavor variations like traditional red bean paste, matcha, or kinako powder to add unique tastes and colors to your creations.
To achieve the desired cuteness, pay attention to the size and consistency of each rice ball, ensuring they’re uniform in shape and texture.
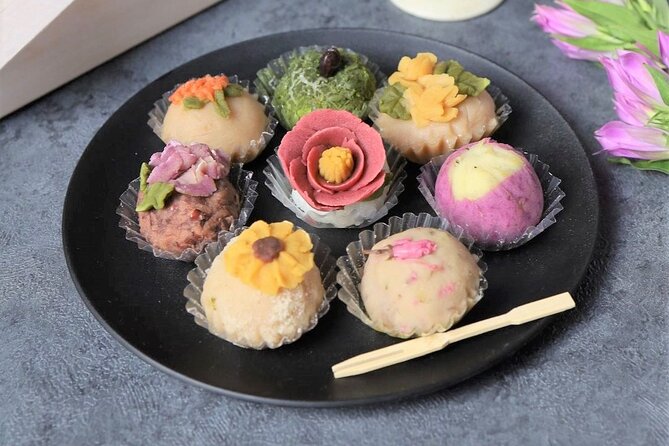
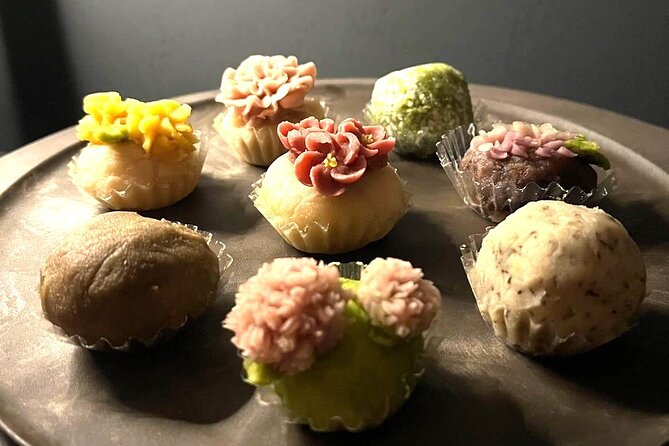
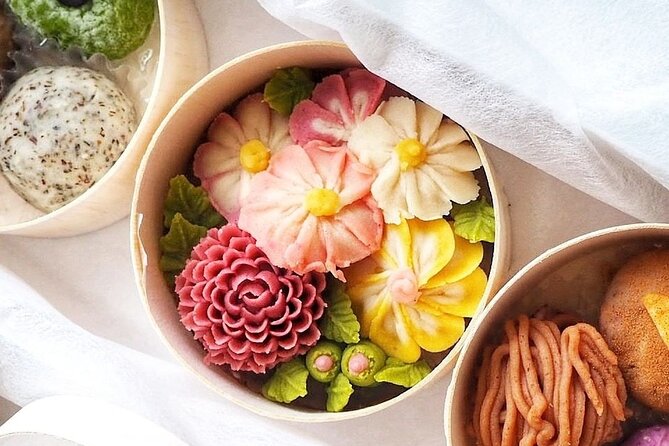
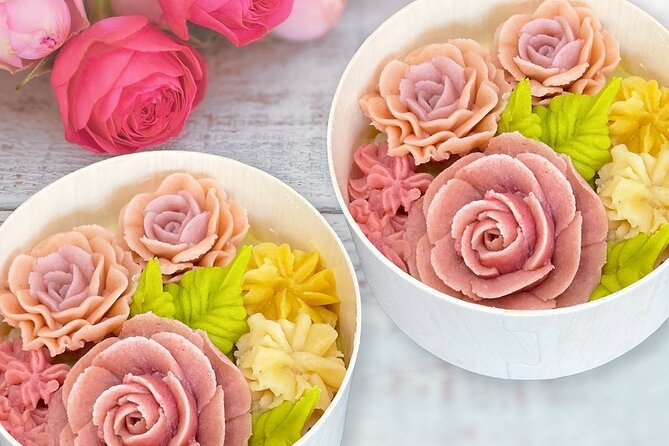
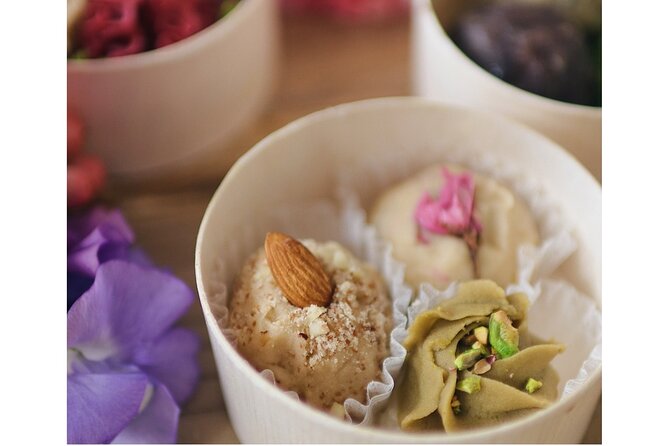
Creative Ohagi Decoration Ideas
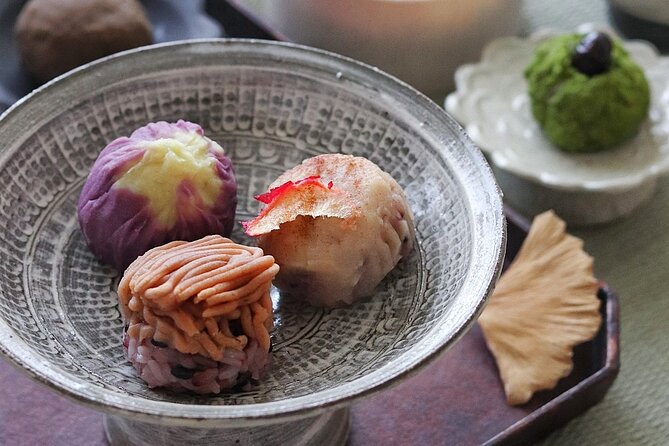
Delight your senses with a myriad of creative Ohagi decoration ideas that showcase the artistry and beauty of Japanese culinary traditions.
-
Colorful Toppings: Sprinkle your Ohagi with vibrant edible flowers like cherry blossoms or pansies for a pop of color.
-
Cute Designs: Use small decorative picks shaped like animals or traditional Japanese symbols to add a touch of charm to your Ohagi.
-
Matcha Powder Art: Dust your Ohagi with intricate patterns using matcha powder stencils for an elegant and artistic finish.
-
Gold Leaf Accents: Elevate your Ohagi by delicately placing edible gold leaf on top for a luxurious and eye-catching decoration.
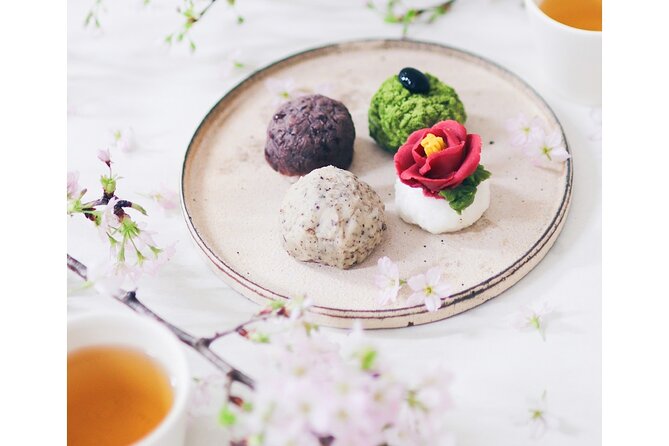
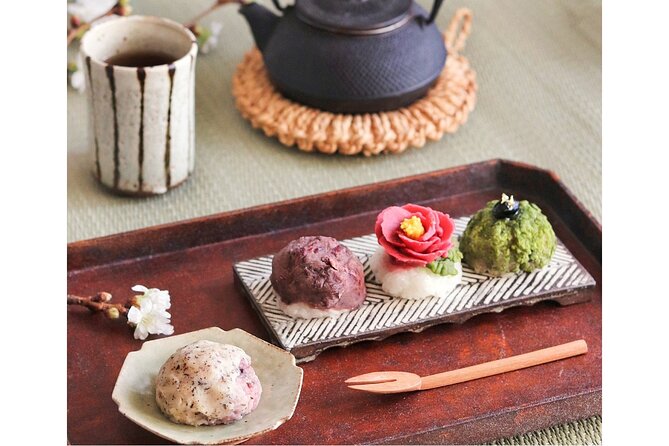
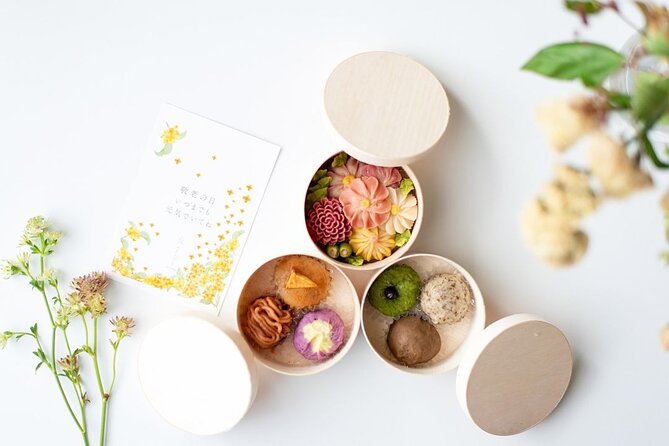
Serving and Presentation Suggestions
Enhance the visual appeal of your ohagi by exploring creative serving and presentation suggestions that highlight the essence of Japanese culinary artistry.
When it comes to plating techniques, consider arranging the ohagi in a traditional Japanese bento box to add an authentic touch.
Pairing the ohagi with a cup of warm matcha can elevate the overall dining experience.
For table setting, choose elegant Japanese porcelain dishes to complement the simplicity of the ohagi.
Garnish ideas could include a sprinkle of kinako (toasted soybean flour) or a delicate cherry blossom for a pop of color.
Storage and Enjoying Ohagi Later
To preserve the freshness and flavor of your ohagi for later enjoyment, store them in an airtight container in the refrigerator. Here are some tips for storing and enjoying ohagi later:
-
Separate Layers: Place parchment paper between each layer of ohagi to prevent sticking and maintain their shape.
-
Avoid Moisture: Ensure the container is completely dry before storing ohagi to prevent moisture buildup.
-
Consume Promptly: Ohagi is best enjoyed within 2-3 days of preparation for optimal taste and texture.
-
Reheating: If desired, gently warm ohagi in the microwave for a few seconds before serving to enhance their softness and flavors.
Common questions
Can I Bring My Own Ingredients to the Ohagi Making Class?
Guests cannot bring custom ingredients to the ohagi making class. The cooking techniques taught utilize traditional Japanese methods. Participants will learn to create these delightful treats using the provided materials, enhancing the cultural experience.
Are Children Allowed to Participate in the Ohagi Making Class?
Children are welcome to join the ohagi making class, creating sweet memories with their parents. This activity fosters creativity, cultural appreciation, and valuable parent-child bonding. It’s a delightful experience filled with learning and fun.
Is There a Dress Code for the Ohagi Making Class?
There is no specific dress code for the ohagi making class, but participants can enhance their experience by wearing traditional attire or accessories. Embracing Japanese etiquette adds a cultural touch to the activity.
Can I Take Home Any Leftover Ingredients or Ohagi After the Class?
Yes, participants can take home any leftover treats or ingredients from the ohagi making class. Sharing is caring, and they can enjoy their ohagi to go. It’s a great way to continue the experience beyond the class.
Are There Restrooms Available at the Meeting Point for the Ohagi Making Class?
Restroom facilities are available at the meeting point for the ohagi making class. They maintain high hygiene standards and cleanliness. The accessibility and cleanliness ensure a comfortable experience for all participants.
Last Words
Indulge in the art of creating Japanese Adorable Ohagi with this hands-on workshop in Nara, Japan. From mastering intricate designs to savoring warm Matcha, participants can enjoy a culinary experience like no other.
With English-speaking guidance, wheelchair accessibility, and certification upon completion, this workshop offers a unique opportunity to learn, create, and savor traditional Japanese delicacies.
Don’t miss out on this chance to hone your culinary skills and create lasting memories in the heart of Japan.